Bot Head
Deinstallation of the head
- For safety reasons, a probe adaptor must be gripped on the FluidFM BOT.
- Make sure that ARYA software is not running and that the BOT control unit is powered off.
- From the back of the FluidFM BOT, open the incubator to access the head. Move the head to the highest position (z-axis).
- Carefully, take out the pressure tube and the head cable out of the socket by pressing the clips on the sides.
- With a 2mm Allen key, unscrew the 2 screws of the head, while keeping the head with one hand.
- Carefully, pull up the head and remove it from the system.
Maintenance of the sealing screw and the nose
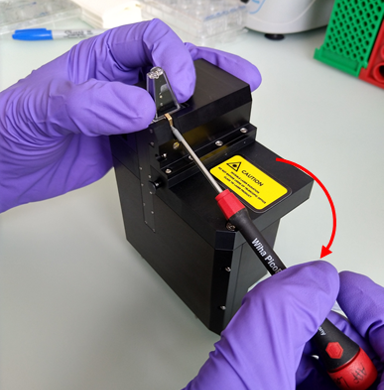
- Place the head on a flat and clean surface.
- Using a T1 screwdriver, lock into the golden gripper and release the probe mounted on the head by rotating the screwdriver vertically down. Remove the probe manually.
- Do the cleaning
- For a soft cleaning, clean the nose with isopropanol using lint-free cleaning sticks and wipes, without removing the sealing screw.
- For a thorough cleaning, after cleaning the nose as indicated before,
- Remove the sealing screw: screw it out with a T1x40 screw driver and remove carefully the O-ring with tweezers.
- Place it together with the O-ring into isopropanol.
- Sonicate for 3-5 min until it is clean.
- Wipe with lint-free tissue.
- If necessary, replace the sealing screw and/or the O-ring for a new one.
- Once it is dry, assemble the O-ring and the sealing screw: to drive it in correctly, first rotate it slightly anticlockwise and then start turning it clockwise. Tighten the sealing screw until dead stop (do not tighten the screw too much).
- For a soft cleaning, clean the nose with isopropanol using lint-free cleaning sticks and wipes, without removing the sealing screw.
- Mount the reference consumable.
- Screw the head on the BOT and connect the microfluidics tubing and the control unit of the BOT.
- Turn on the control unit, the FluidFM microfluidics system and ARYA.
- Perform a XY and Z calibration of the head