Injection
There are two kinds of injections that differ in the injection procedure.
- Constant force injection - Injection (Constant Force)
- Constant Z position injection - Injection (Constant Z Pos)
Both injection workflow consists of the three steps Positioning, Injection and Review.
Note
As of version 2.17, the Injection workflow was renamed to Constant Force Injection and the new workflow Constant Z Position Injection was added.
Positioning
The first step of the injection process is to select the positions where the injections should take place. Refer to Position Selection to see how to select positions for injection.
Injection Procedure
In the following sections the two injections procedures Constant force injection and Constant Z position injection are described.
The injection procedure is followed by an optional flushing of the probe.
Constant Force Injection
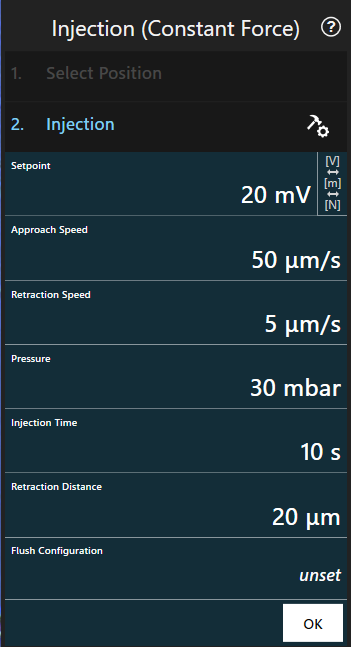
Procedure
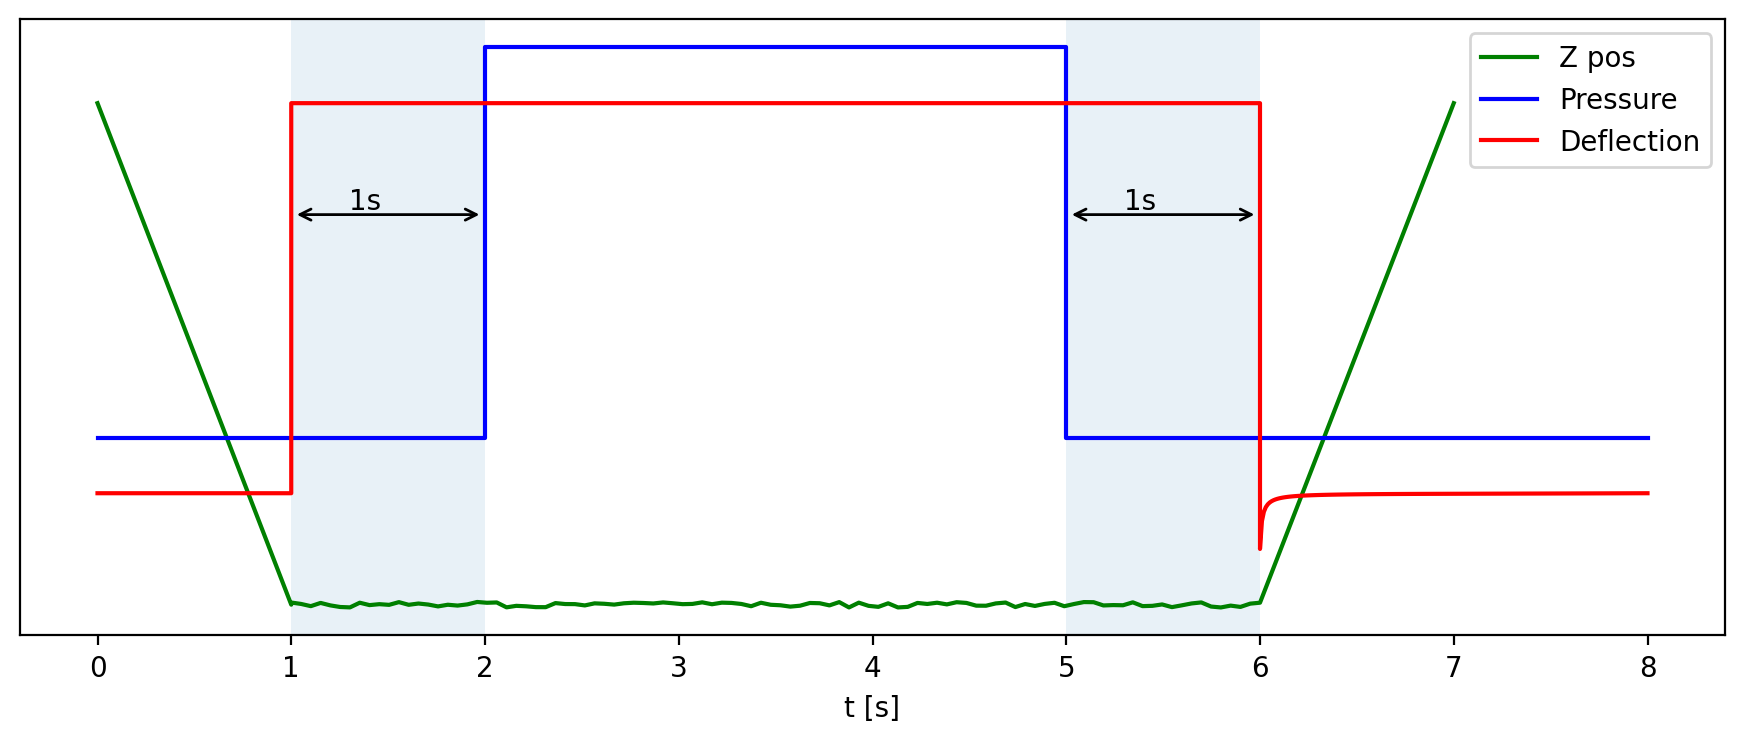
This step approaches towards the surface until the configured setpoint is reached and then keeps it for the configured amount of time by adjusting the z position. After this, the probe is retracted by a fixed distance.
The configured pressure is applied while the probe is in contact. Note that delays of one second are applied before and after the pressure pulse to achieve better results. This implies that the time during which the probe stays in contact is always two seconds longer than configured in the program.
Idle pressure is applied during approach and retraction.
Constant Z Position Injection
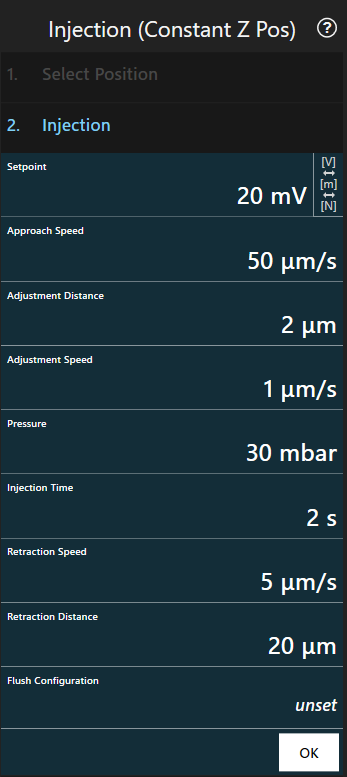
Procedure
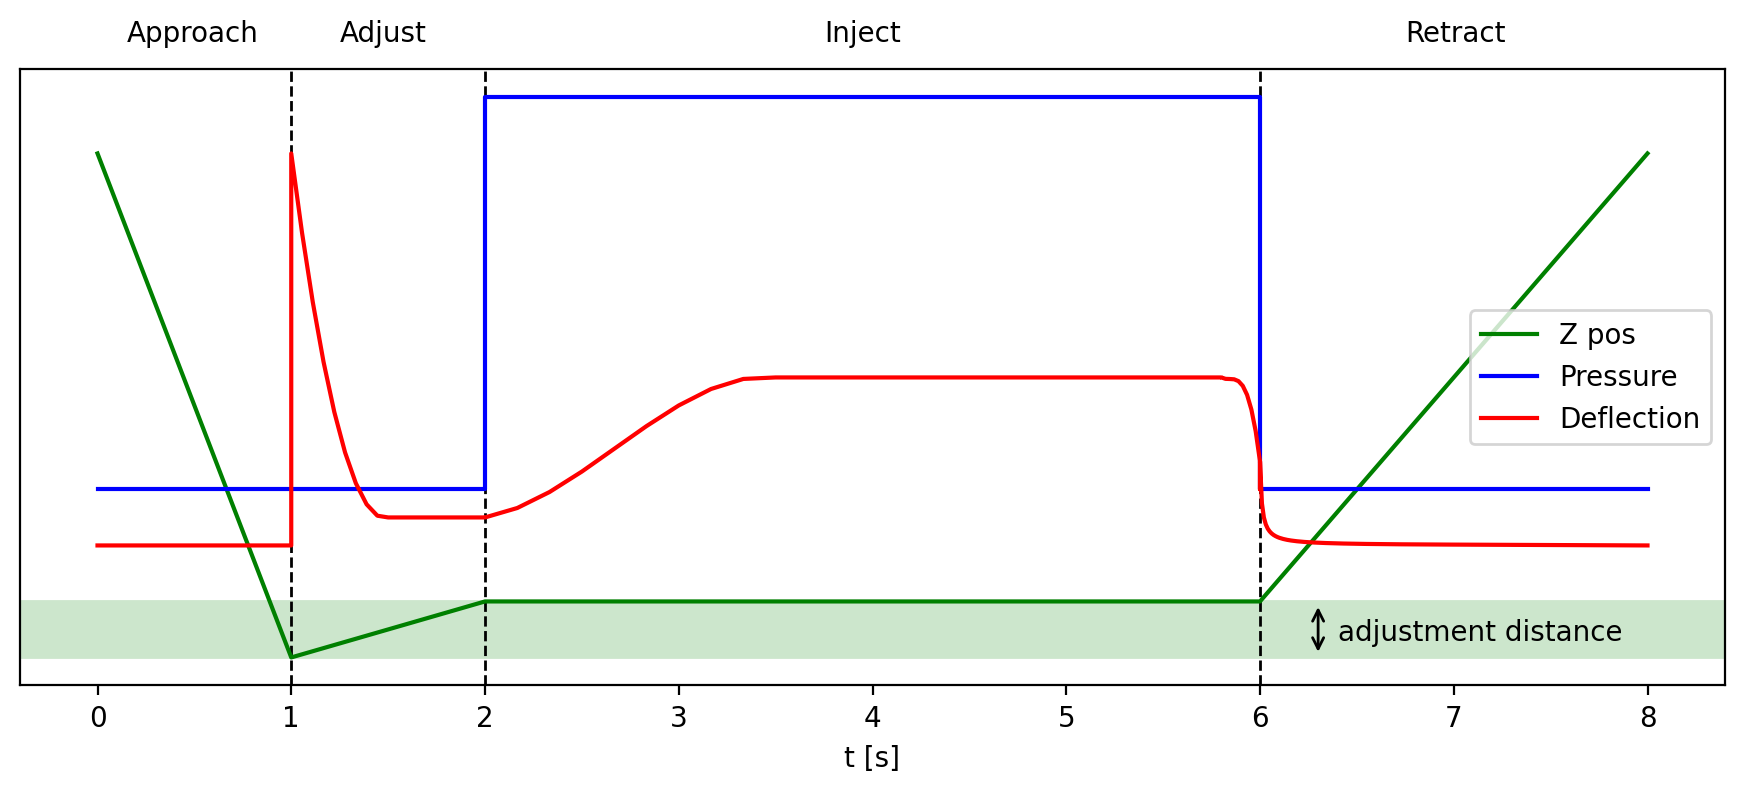
This step approaches towards the surface until the configured setpoint is reached and then retracts the probe by the adjustment distance at adjustment speed.
The configured pressure is applied over the injection time while the Z position remains the same. The setpoint is not held during the injection. After the injection, the probe is retracted by a fixed distance.
Idle pressure is applied during approach and retraction.
Probe flushing
The probe can be flushed after processing a certain amount of positions by changing the Flushing Configuration:
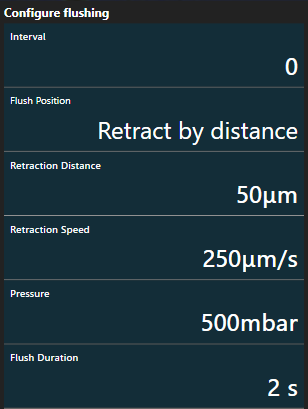
Parameters
| Parameter | Description |
|---|---|
Interval |
The number of positions that are processed before each flushing. When set to n >0, flushing occurs after every n-th position; when set to 0, flushing is turned off. |
Flush Position |
Whether to flush the probe at content height or at the position defined by Retraction distance. |
Retraction Distance |
The distance by which to retract the probe before starting to flush. |
Retraction Speed |
The speed at which to retract the probe before starting to flush. The same speed is applied when returning to the previous position after flushing. |
Pressure |
The pressure to apply during flushing. |
Flush Duration |
Specifies the amount of time during which the flushing pressure is applied. |
Probe Flushing Procedure
The following steps are executed after the number of positions as specified by Interval have been processed:
- The probe moves to the next position to process
- The probe retracts to the position specified by Flush Position and (optionally) Retraction Distance at the speed specified by Retraction Speed
- The probe is flushed using the configured pressure and duration
- The probe returns to the same height as is was before step 2 (again at the speed specified by Retraction Speed)
- The system waits until the pressure is close to idle pressure to ensure that the pressure is not too high when approaching the next position
After this, the next position is processed.
The flushing is not executed when there are no more positions to process or when Interval is set to 0.
Review
Refer to Position Selection to see how to save the processed positions as a point group.