Cantilever Volume Calculator
This tool allows estimating the volume of liquid in the visible part of a cantilever using a single image as well as estimating the difference of volume in the visible part of a cantilever using two images recorded at different times.
Prerequisites
The volume of liquid inside the cantilever is usually estimated after a completed extraction run.
- For each volume an image focused on the cantilever and associated with a point (e.g. the one selected for the extraction step) must be available.
- For estimation of a volume difference, two such images with the same image settings must be available and associated with the same point.
- The liquid should have a clearly visible boundary in the image (e.g. the interface with a different medium such as mineral oil)
Overview
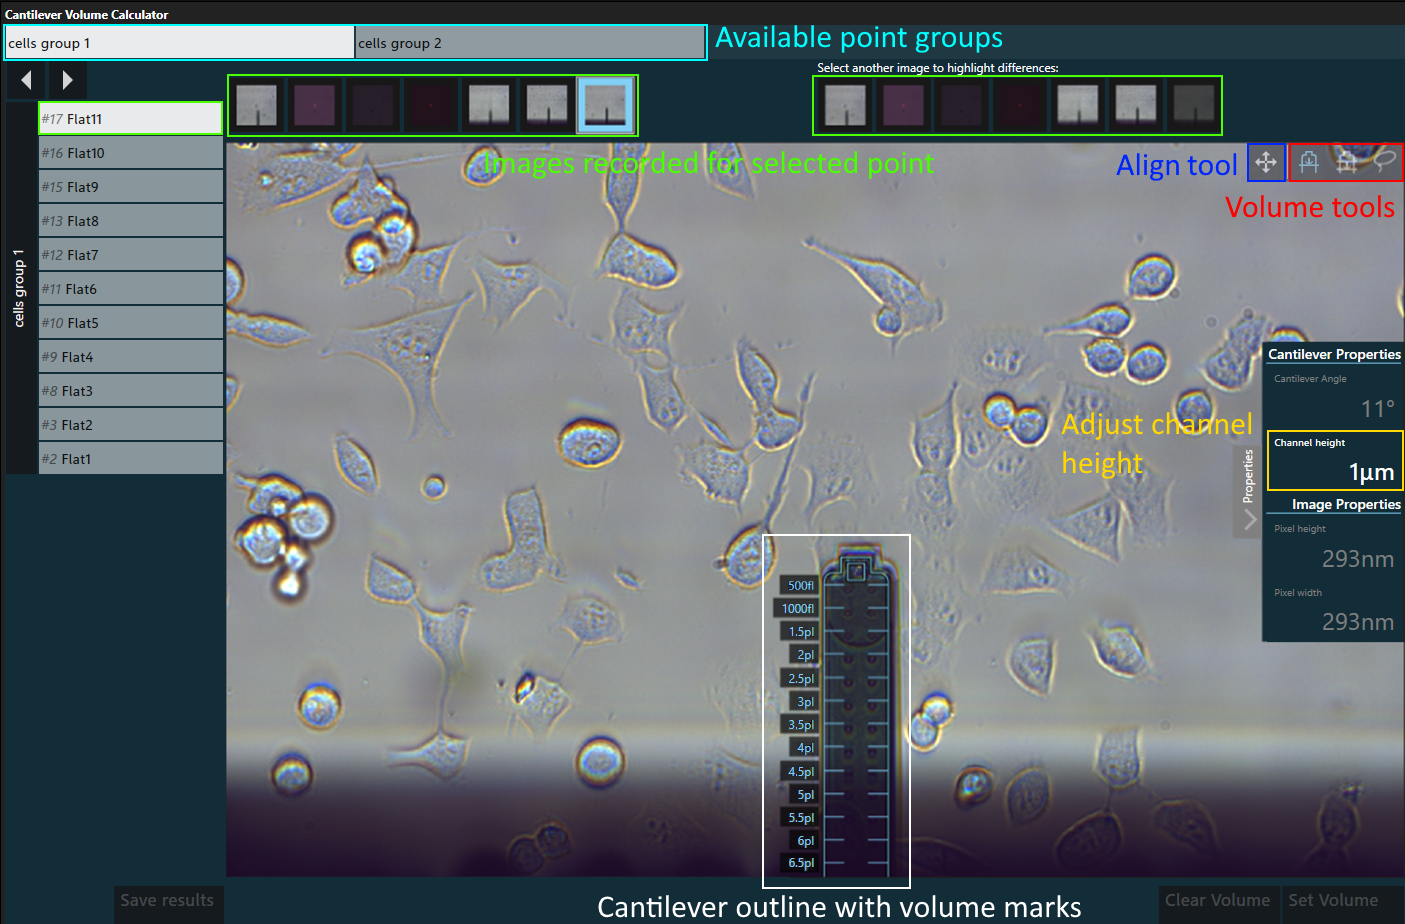
- Cantilever Volume Estimation Dialog
Process
- At the top of the dialog, select the group that contains the points associated with the relevant images. If the points are not grouped, select ungrouped points.
- On the left side, select a point. Move between points using the left/right arrows above the list or the
←and→keys on the keyboard. - Confirm or adjust the inner height of the cantilever is correct by opening the
Propertieson the right edge. This value defaults to theActive Channel Heightin the settings. - Select an image with focused cantilever from the image overview (left side).
- For volume difference, select another image from the right image overview. Upon selection of the second image, the difference of the two selected images is displayed in the main view. To revert to the original image, de-select the second image.
- If necessary, properly align the overlaid outline of the cantilever with the actual cantilever in the image using the align tool.
- Determine the volume using one of the volume tools described below.
- Press
Set Volumeor theEnterkey to set the volume for the selected point. The volume will be indicated next to the selected point’s number and name. - Continue with the next point. When all points are processed, press
Save resultsto save an image with the volume information as a result.
Align tool 
Select this tool, then click and drag the mouse anywhere inside the outlined cantilever to align the outline with the actual position of the cantilever.
The align tool is also enabled by pressing and holding the Shift key on the keyboard and disabled when the Shift is released.
Clicking the right mouse button while the align tool is enabled, resets the cantilever outline to its original position.
Volume tools
The volume tools allow volume estimation in three different ways and all use the following equation for the volume calculation:

- Equation for calculating fl per px Ph =
Pixel height[µm] Pw =Pixel width[µm] Ch =Cantilever height[µm] C∠ =Cantilever angle
Line tool 
This tool calculates the volume from the end of the cantilever up to a vertical line that can be adjusted by dragging. The volume always includes the pyramid (tip) of a nanosyringe.
Rectangle tool 
This tool calculates the volume between two vertical lines in the cantilever. Drag either line to change the selected volume.
“Lasso” tool 
This tool calculates the volume inside a freely selectable area inside the cantilever.
Press and hold the left mouse button, then outline the volume to calculated inside the cantilever. The selection is always restricted by the cantilever’s outline. Use the right mouse button instead to remove a portion of a previous selection.
If the selection intersects with the pyramid (tip) of the nanosyringe, the whole pyramid is added to the volume.
Image zoom & position
Independent of the active tool, the image can be zoomed and positioned by holding down the Ctrl key and scrolling with the mouse wheel (to zoom) or left-clicking and dragging with the mouse (to move the zoomed image)
Saving results
Pressing Save results saves the image (or difference image) on which the volume selection was made and applied through Set Volume, highlighting the selection within the saved image. The calculated volume is saved as metadata.
Saved images are marked with a  and are then available in the result history, from where they can be exported.
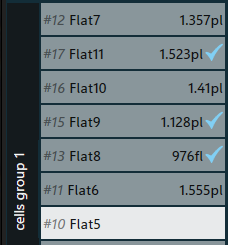
- 3 out of 6 images with volumes saved