Overview
When CORA is started for the first time, the software displays just the Pressure Tool.
Other tools can be activated using the “Tools” menu. When multiple tools are shown, the space allocated to each tool can be adjusted by dragging the vertical bars between the tools.
Upon closing CORA remembers which tools are shown and restores previously activated modules upon restart.
Pressure Tool
When CORA starts, the pressure tool automatically tries to connect to the pressure controller. If the pressure controller is disconnected or switched off, an error is displayed. To retry connecting the software has to be restarted.
The pressure tool is divided into two sections:
Pressure Plot
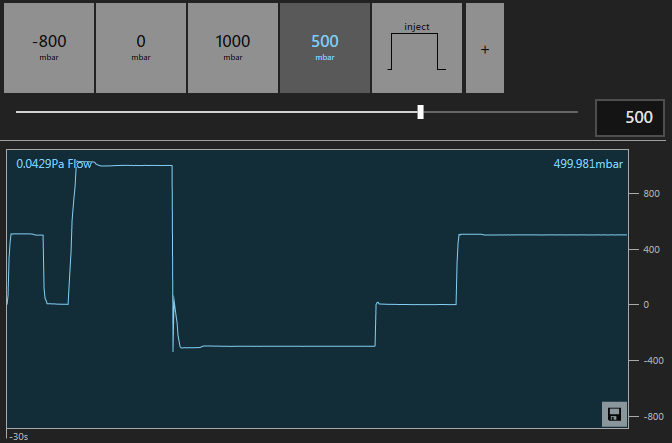
The lower part displays the pressure applied by the pressure controller as measured by the sensor in a time-plot. The latest measured plot and flow are also displayed as numerical values. The plot always shows the last 30 seconds with the oldest values on the left - changing the size of the plotting area does not affect the plotting range.
Pressure Controls
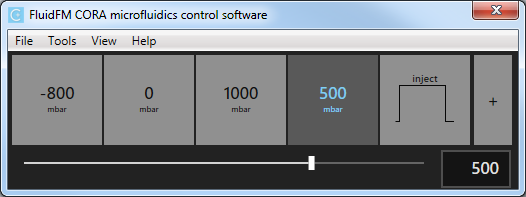
The upper part is where the elements for controlling the pressure are located. One can set the desired pressure using either the slider, the numerical input box or by pressing one of the predefined pressure set buttons.
Note
All pressure values must be entered in millibar.
The first three pressure sets are automatically generated according to the range supported by the hardware. New entries can be added by pressing the “+” button. The configured pressure sets are restored when the software is restarted.
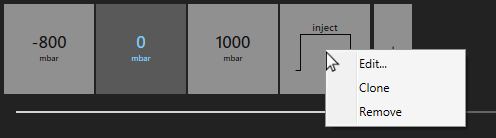
Existing entries can be modified or cloned (copied) by right-clicking them. Once a pressure set is activated, it cannot be edited until another pressure is applied.
Pressure Pulse
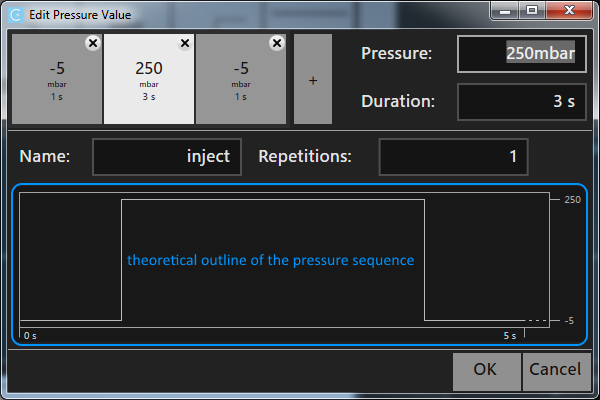
When a pressure set is created or edited, it is also possible to create a sequence of pressures (pressure pulse) that will be applied for a specified duration once the corresponding pressure set is clicked in the main control. To create a sequence, the “+” button in the editor has to be pressed to add another pressure value. The pressure value and duration of application can then be edited per pressure item in the sequence.
The duration field accepts a range of formats:
- If no unit is specified, integral numbers are interpreted as seconds.
- Decimal numbers have to specify a unit - supported units are:
d,h,minorm,sorms - Alternatively, the duration can be entered in the format
1d 10:45:30meaning 1 day, 10 hours, 45 minutes and 30 seconds.
Note
Due to pneumatic limitations, the shortest duration for an item in a sequence is 100ms.
Warning
The last pressure in the sequence will be applied indefinitely (even if it has a finite duration) until a different pressure is set.
A few rules apply to pressure sequences:
- All pressures in a sequence must have finite durations except the last one.
- When all pressures in a sequence (including the last) have a finite duration, it is possible to repeat the sequence once it completes.
- A pressure sequence name may not exceed 10 characters.
Note
The number of repetitions is limited to 2‘147‘483‘647. If a greater number is entered, the sequence will be repeated indefinitely.
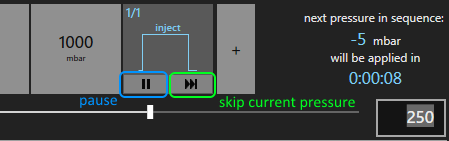
Once a pressure sequence has started, new buttons appear on the pressure set that allow pausing the sequence, as well as skipping immediately to the next pressure in the sequence.
Pressure Range
The hardware defines a possible pressure range - values beyond this range are rejected by the software. The supported range can be seen in “Tools” → “Settings…” → “Pressure Range”.
Export
Pressing the  symbol in the bottom right corner of the pressure plot exports the values shown in the oscilloscope to a file.
Values are written as millibars, separated by newlines. The number of values correspond to the plot’s duration as shown in the oscilloscope (that is, the last 30 seconds at 25 values/second).
Example
# Pressure Values [mbar]
-278.60888671875
-277.920196533203
-278.60888671875
-276.46630859375
-272.219482421875
...
Barcode Tool
(Please make sure the barcode reader is properly set up.)
Accessible through “Tools” → “Bacode Scanner”
The barcode printed on the packaging of a probe contains details specific to this probe. Scanning this barcode loads the details into the software and displays them in a table. If an internet connection is available a high-resolution image of the probe is downloaded and shown above the table, too.
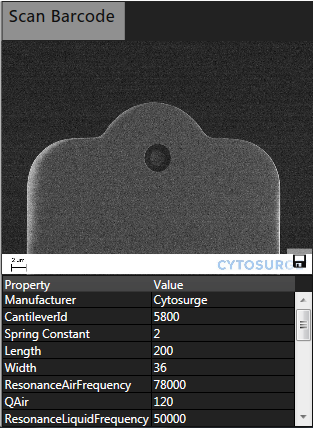
Note
Scanning works most reliably if the barcode is located 7 to 10 cm (3 to 4 inches) in front of the reader.
Export
Pressing the symbol in the bottom right corner of the probe image exports the image to a file.
The file is stored as uncompressed png graphic in its native resolution. If available, the unique probe identifier is included in the suggested filename.
The properties in the table can be copied to the clipboard with the Ctrl-C shortcut. Single and multiple row selection is supported.
Video Tool
(please make sure the camera is properly set up)
Accessible through “Tools” → “Camera”
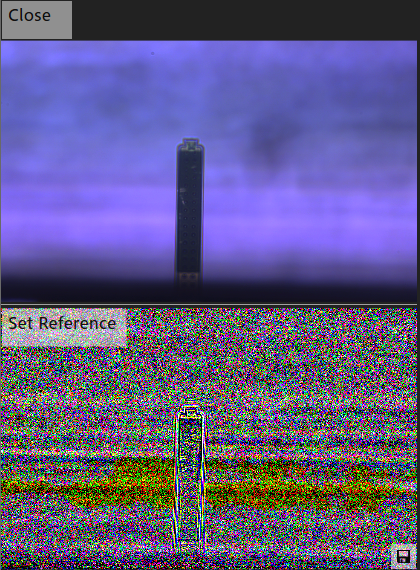
The video tool is divided into two sections.
The upper part displays the camera’s video feed.
Below the feed is a viewing mode that highlights changes in the current video frame from a reference image. This amplifies contrast changes, which for example allows to easily determine when a probe is filled with liquid. Pressing the “Set Reference” button changes the reference image to the current video image.
Use the “Open/Close” button to acquire and release camera resources respectively. Before the camera can be used in another program, the resources should be released as otherwise the device appears to be busy to the other program.
Camera settings are available under “View” → “Settings…”.
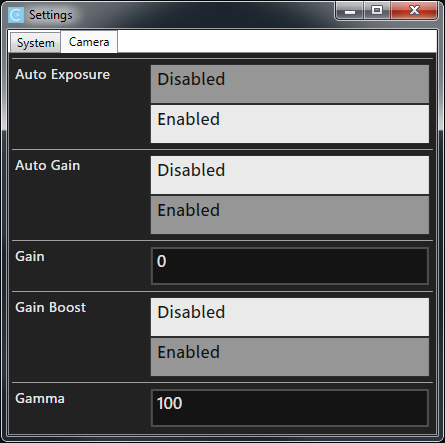
Numerical settings are applied when the field loses focus (e.g. by tabbing further or clicking somewhere else). However, depending on the frame rate it might take a while before the new setting becomes visible.
Also, certain parameters are not always shown. E.g. Exposure Time is only shown when Auto Exposure is set to Disabled
Export
Pressing the symbol in the bottom right corner of the video tool exports both images to a separate file.
The images are stored as uncompressed png graphic in native resolution (i.e. independent of the scaling in the video tool).
Only the name of the video image must be specified. The difference image is stored with the suffix _diff.png.
Flow Measurement Tool
(only if supported by the hardware)
Accessible through “Tools” → “Measure Flow…”
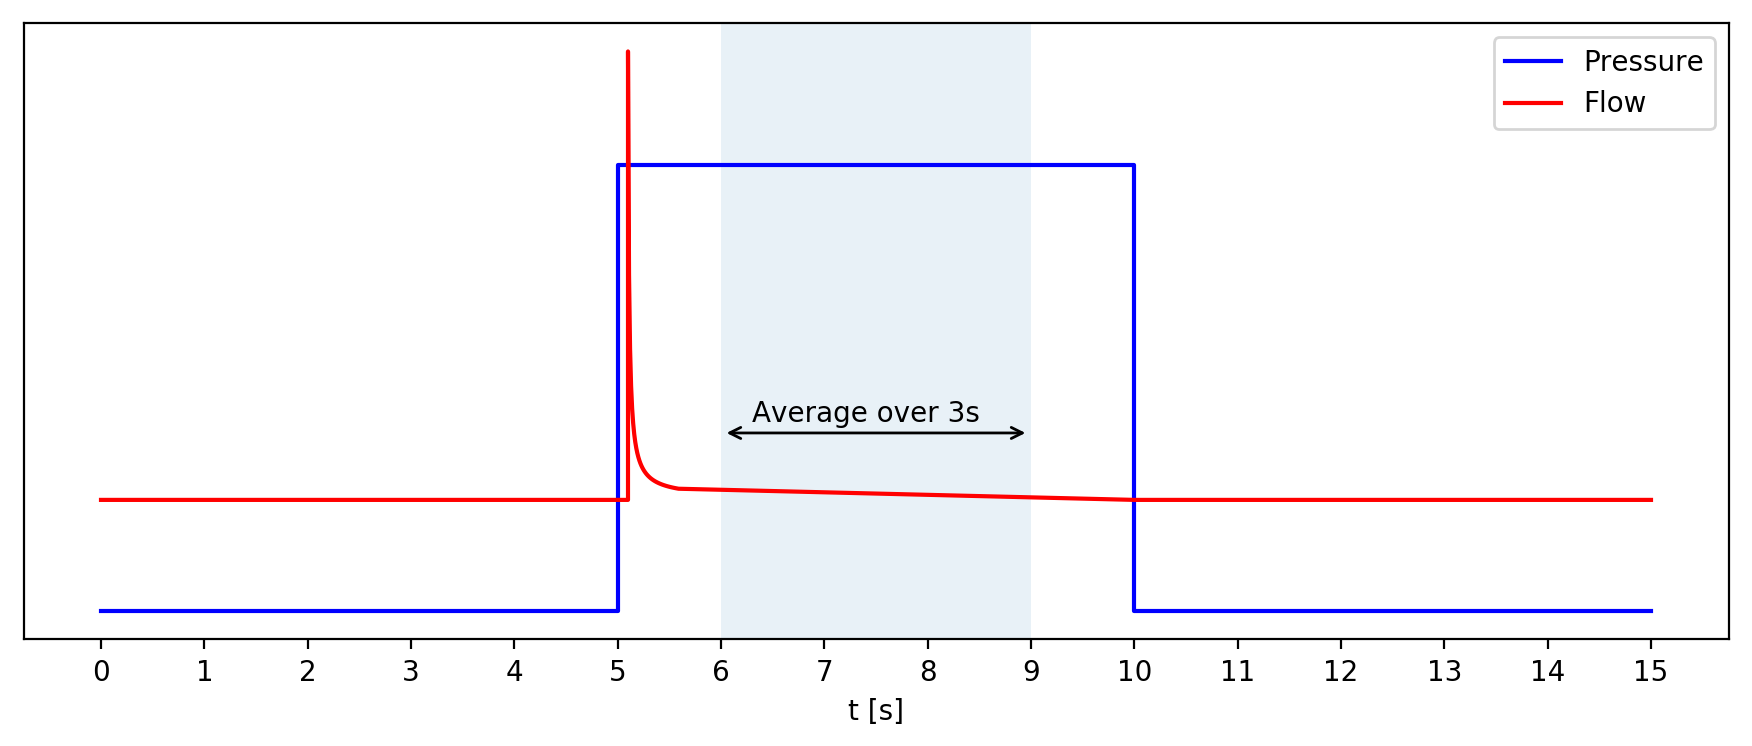
The Flow Measurement Tool allows checking the hardware setup for leaks by measuring the flow with a predefined pressure sequence.
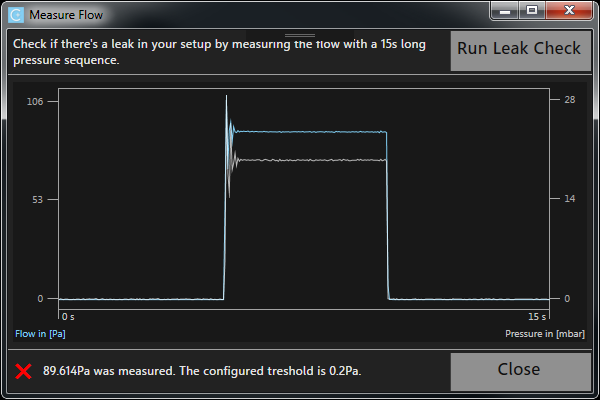
The tool applies 0mbar for 5 seconds, then 20mbar for 5 seconds and finally 0mbar for 5 seconds again. The flow value is compared with the configured leak check threshold to give appropriate feedback.
The average of 3 seconds while 20mbar are applied is used to compare the value with the threshold.
The leak check threshold can be configured under “Tools” → “Settings…”.

Options
Compact Mode
This mode, available under “View” → “Compact”, temporarily closes the camera and barcode module if loaded and hides the plotting area of the pressure module. Only the elements to control the pressure are shown.
Stay On Top
This mode, available under “View” → “Stay On Top”, attempts to always keep CORA‘s window “above” other programs, even if CORA is not focused. In contrast, if this option is disabled, then CORA may be “hidden” behind another program that receives focus. This behavior enables interacting mainly with another program while keeping CORA visible all the time, eliminating the need to switch back and forth between programs.
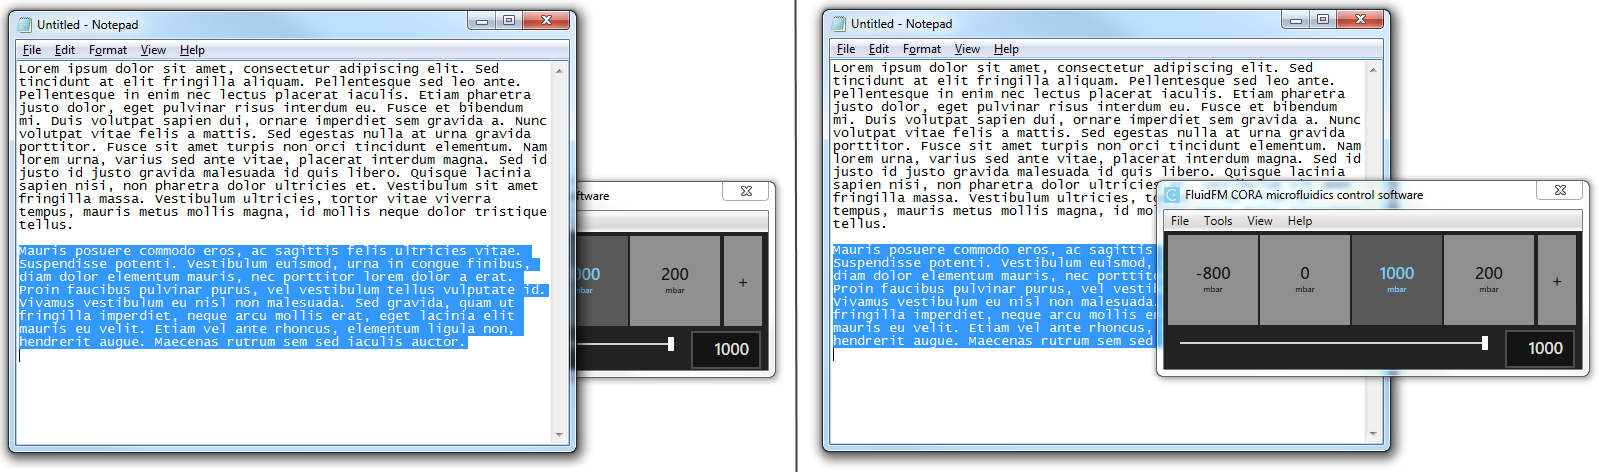
- Left: CORA is hidden behind the selected notepad window (default windows behavior).
Right: CORA stays on top of the selected notepad window even though not focused (“Stay On Top” enabled).
Note
The “Stay On Top” mode may not work reliably if another program is trying to achieve the same behavior.
Settings
| Settings Name | Description | Affected Components | Persistent |
|---|---|---|---|
Barcode Scanner |
Port used by the barcode scanner | Barcode Scanner | Yes |
Cameras |
Cameras connected to the PC. A single entry can be marked/unmarked as favorite | Video Tool | Partially (only the favorite) |
Pressure Range |
Pressure range of the current pressure controller | Pressure Tool | No |
Flow Leak Check Threshold |
Value to compare against in the Flow Measurement Tool to check for leaks in the setup. If the measured value is greater than the specified threshold, a warning is displayed. | Flow Measurement Tool | Yes |