Hardware
This video guides you through the installation of the FluidFM ADD-ON for AFM.
Contents:
- FluidFM ADD-ON Packages Content 00:17
- Lab Requirements 00:40
- Unpacking Microfluidics Control System 00:52
- Assembling Barcode Reader 01:18
- Wiring Microfluidics Control System 01:48
- Installing Liquid Trap (only for Gold & Platinum Package) 02:44
- Connecting Tube to AFM 03:28
- Installing Manual Pressure Kit (only for Gold & Platinum Package) 03:48
- Installing Camera Module (only for Platinum Package) 04:39
- Installing CORA Operator Software 05:20
Software
Download
Click here to download the latest CORA installer.
Requirements
- Windows 7 x64 or Windows 10 x64 “Fall Creators Update (v1907)”
- Administrator rights to run the installer
- Internet connectivity to enable the automatic driver and .net framework installation.
Pressure Tool
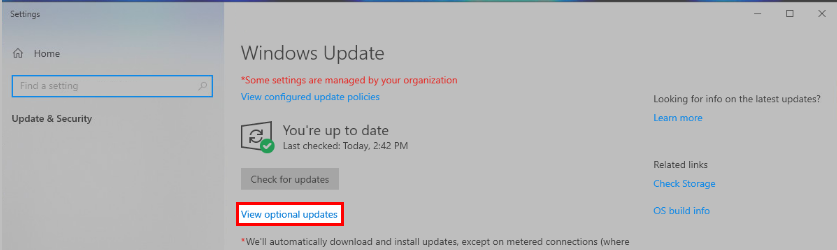
On some Windows 10 systems the driver needs to be installed manually. To do so
- Connect the device and wait until Windows could identify it
- Open “Windows Update Settings” and select “View Optional Updates”
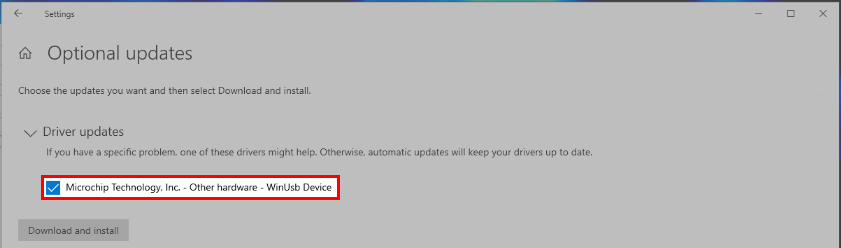
- Expand the section “Driver updates” and select “Microchip Technology Inc. - Other hardware - WinUsb Device”
Camera Tool
If applicable
To use the camera, an additional camera driver has to be installed manually. The driver is available from the IDS homepage (you will have to register before you can download). Only the USB driver is required for the camera to work.
Note
If the video feedback is stuttering, consider changing the system’s usb configuration. Ideally, the camera does not share the usb bus with other devices that require high bandwidth or the camera is even connected via a dedicated usb card.
Multiple cameras
If multiple cameras are connected to the same PC
By default, the camera tool tries to connect to a single available camera and will display an error if no camera or more than one camera is available.
To select a specific camera in a multi-camera setup, open the configuration dialog in “Tools” → “Settings…” and select a favorite in the list of cameras:
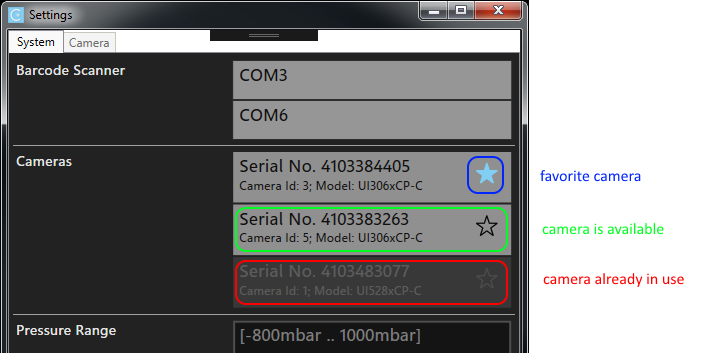
- List of connected cameras. The star indicates the selected favorite. Cameras used otherwise are grayed out.
You can only specify a single camera favorite. Once selected the camera tool will only try to connect to this camera and display an error if the camera is not available.
Note
The software identifies the favorite camera by its serial number. Therefore, the favorite must be set anew when the camera is exchanged.
Barcode Tool
If applicable
The barcode tool requires an initial setup procedure. A communication identifier must be set before initial use. This is because the program cannot automatically scan for connected devices.
Open the configuration dialog in “Tools” → “Settings…”
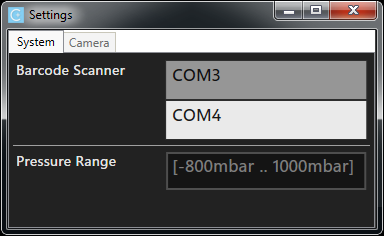
The upper part lists all available communication ports. The list is updated every few seconds. The port associated to the barcode reader must be chosen by selecting the corresponding list entry.
Plug in the barcode tool and select the newly added identifier. In case the barcode tool is already plugged in, remove it, wait ten seconds and connect it again. This is the easiest way to determine the port identifier.
After the port has been configured, close the dialog, and press the open button to initiate the communication with the barcode reader.
Note
The communication port identifier might change if the barcode tool is connected to a different usb port. In such a case, the procedure above must be repeated.
Windows 7
At the end of the setup process, drivers for the Pressure Controller and the Barcode Reader will be installed. These drivers are not signed and Windows will ask you to confirm installation of these drivers:

Press “Install this driver software anyway” for each of the two drivers to continue the installation.
Updates
The software automatically checks whether an update is available on startup. If it finds a newer version, a hyperlink is displayed in the top right corner. Click on the link to visit a homepage where the update can be downloaded. The update will have to be installed manually.

It is also possible to check for a new software version in “Help” → “About”
Internet Access
The following internet addresses are called by CORA for various reasons:
| Internet Address | Reason |
|---|---|
documentation.cytosurge.com |
Read the CORA manual |
updates.cytosurge.com |
Check if updates are available Load promotional banners |
cytosurge.ch/shop |
Get information on a cantilever after barcode scan |
Troubleshooting
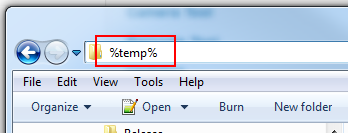
If you encounter problems during installation, please contact support (support@fluidfm.com) and provide the installation log files, which are located in Temp folder of the current user. They can be found in Windows Explorer by typing
%temp% into the address bar:
The installation log files start with CORA_... (depending on the installation status, one or more of these may be missing)
